Beehive Knobs

I was recently asked to make some beehive knobs.
So after making a sample the design below was agreed.


The knobs were to be made from Maple, so i started some 1 1/4" square timber mounted between centers.


This was turned round, spigots & blank lengths marked out & cut with a parting tool.


The spigots were turned down to 1/2", not only would these  later be the means of holding the blanks in a chuck, but are also for fixing to the cabinets.


At this stage the blanks were cut up in to single pieces at the bandsaw.


Re-mounted in pin jaws, the rough shape of the knob was turned with a spindle gauge.


Then with a beading tool the pattern was formed.


The pattern finished & some intricate sanding complete


Finally after a few hours the order was complete, the eagle eyed will notice there are 2 different sizes.


Loo roll holder

Having just finished a make over of our downstairs cloakroom, we were in need of a loo roll holder & as  I`d used oak for the fit out i decided I`d carry on the theme by turning an Oak holder.

First off the cloakroom so far.


To get the holder started i fixed an 80mm blank on a screw mount, this was then held in pin jaws & turned round & sanded.


This was set to one side & a 45mm square piece of stock mounted between centers & the front bar of the holder turned.


I left the ends square & didn`t go to thin where the bar would be later parted off from the scrap as i needed some strength as the next job was to drill a hole for the piece that would join the bar to the back plate at the pillar drill.

.
 First an 18mm hole was drilled so the connecting bar would sit on a flat surface, then the bar was turned over  & a 12mm hole drilled all the way through.


The next job was to make the connecting bar, it needed to be 18mm round with two 12mm tenons on the ends.


With the connecting bar ready the ends were trimmed off the main bar, a + slot cut in the end of one tenon, glue applied & the two bars joined together. In all the excitement i didn`t photo this & only have a picture of the finished tenon being cleaned up with a sharp chisel.


To make up for missing the cutting of the tenon, gluing & wedging, I photo`d the other end being jointed into the back plate.


Whilst the glue was going off i turned my attention to a blank i`d glued up first thing.


The blank consisted of a veneer of Blackwood sandwiched between 2 pieces of Oak from which I turned these two screw covers.


Back to the holder, the tenon was cleaned up & given a good sanding, then back to the pillar drill & the fixing holes bored.


The finished holder, complete with screw covers, though I'm not sure if i like them, they may be replaced with plain ones once oiled & fitted.


I`ll add a photo of the holder fixed in position once oiled.

Offset bowl

After a bit of a drought on the turning front, today i had a go at an offset decorative bowl.

Starting with a blank hot glued to a piece of 26mm MDF which was in turn screwed to a face plate, i turned a small hollow, the fastest speed i got to was 365 RPM due to the amount the blank was out of center. I had toyed with the idea of screwing something to the MDF over hang to counter weight the piece but as nothing was to hand i ploughed on slowly.


I had hoped to re-use the MDF but being worried about the stability of the blank i over did it with the hot glue & ended up tearing the MDF to bits getting the blank off. On a plus side it showed how well the glue holds.

With a new piece of MDF screwed to the face plate, the blank was reversed. I`d chamfered the edge of the MDF with a hand plane as i was going to try a different approach with the hot glue.


With the blank centered on the MDF i filled the chamfer with hot glue, it was then time to mount it on the lathe.


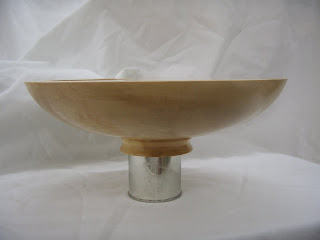
Happy that the blank was holding, i turned the bottom of the bowl including a foot. Not only did i want the foot for holding purposes, but as this is only going to be a decorative piece, i like to see the bowl raised as it adds lightness to what is quite a big bowl.


This time the bowl was much easier to remove, just running a Stanley knife through the glue joint.

With the bowl held in a chuck via the foot, the face was trued up & sanded, once happy with the surface prep, the bowl was sprayed with a coat of acrylic sanding sealed & then acrylic lacquer.


This will be de-nibed & sprayed a couple more times before being returned to the lathe & cutting back with burnishing cream.

Brick pen

This is a guide to how i go about making a "brick pen"
First i start with a 3/4" square length of  sapele, this is cut in half length ways & the cut edges planed flat.


With a false fence fixed to the bandsaw fence a veneer strip is cut from a piece of maple, the cut edge is sanded flat.

The veneer strip is then glued between the 2 halves of sapele.


This is then repeated so a length ways cross of maple is formed, this is then fitted on the lathe between centers.

Then turned to a cylinder & a hole drilled through the center for the pen tubes.


The cylinder is then cut up into sections at the chop saw, sacrificial fence & base prevents tear out & a stop block ensures the sections are the same length.


These sections are then glued to another veneer of maple with ca glue & activator


Cut into separate sections once again the veneer is sanded flush.


The sections are were then glued to the pen tubes with ca glue staggering the sections to form the brick pattern.

back to the lathe & the blanks are turned to shape.


The finished pen.

Ebonised & gilded Ash bowl


I got round today to trying some silver gild wax on this ebonised Ash bowl, i started with an Ash blank fixed to the lathe via a face plate.


The base shape of the bowl was turned including a spigot to allow the bowl to be reversed & held on the lathe by chuck jaws in expansion mode.


With the base sanded & a coat of cellulose sanding sealer applied the bowl was reversed chucked, the top shape of the bowl turned, sanded & sealed. I then masked the small bowl ready for spraying.


The rim was then sprayed with Chestnut`s ebonising spray.


The masking tape was removed, a little sanding was necessary then the gild wax was applied to the grain.


Finally a few photos of it polished.